Newsprint Underglaze Transfer Process
Check out the Videos page for more information on how to work with newsprint underglaze transfers.
There are several ways to apply a newsprint underglaze transfer to clay. Some are easier to learn than others. To know which approach to take, first read through the techniques below, and think your project through from beginning to end. Are you starting with a flat slab that will eventually be molded into a plate or bowl using a form? Or are you working with cylindrical shapes such as vases or mugs? The easiest place to start learning the process is to transfer an image to a flat slab.
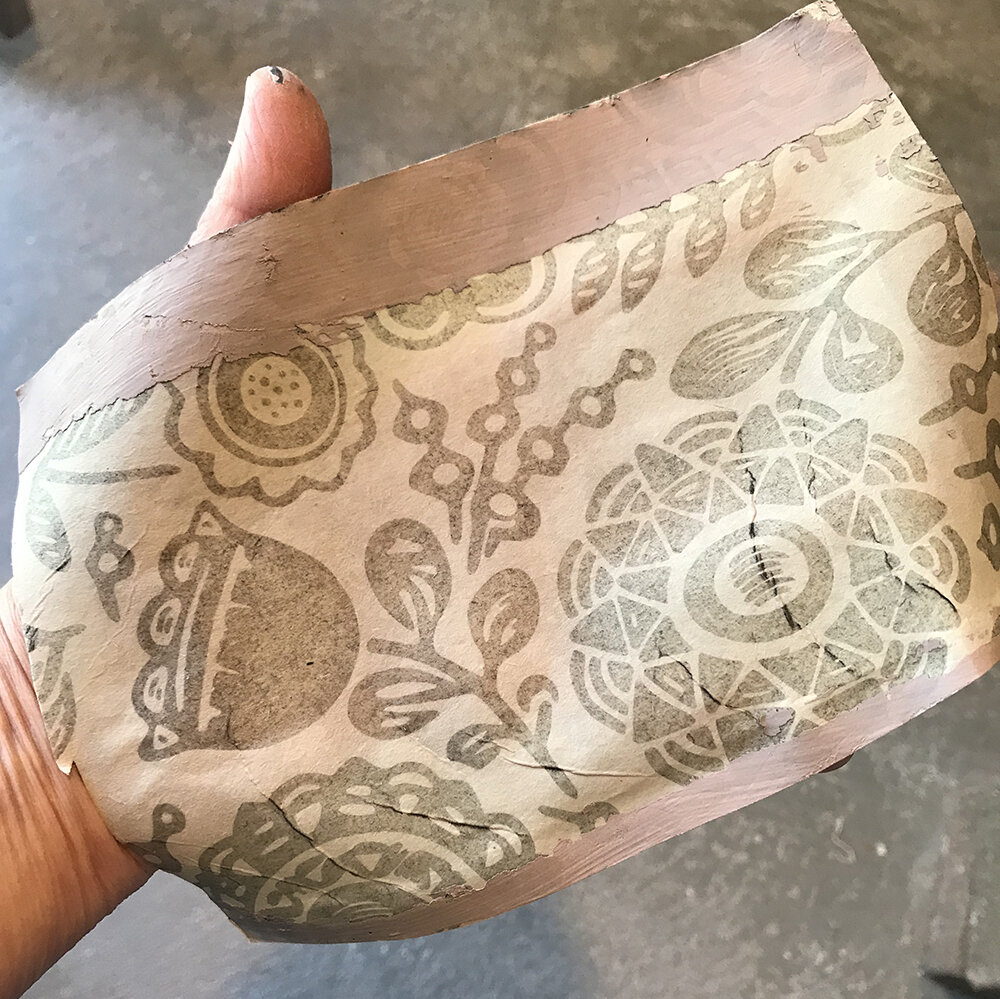
Please note that applying transfers to clay is not for the faint at heart. The process can be all consuming and tedious at the start. Like learning any new technique or skill, you will only master it with practice. Eventually, you will learn to recognize when the water content of the clay allows for the transfer to work well. You’ll know the transfer has worked well when there is but a trace of the image left on the newsprint when you are done. The key to success is trying many times and evolving your technique. When everything follows the right course, the results can be truly beautiful and exciting. If things go wrong, you can always start over by simply wiping away the transfer, letting the clay set up again and giving it another whirl.

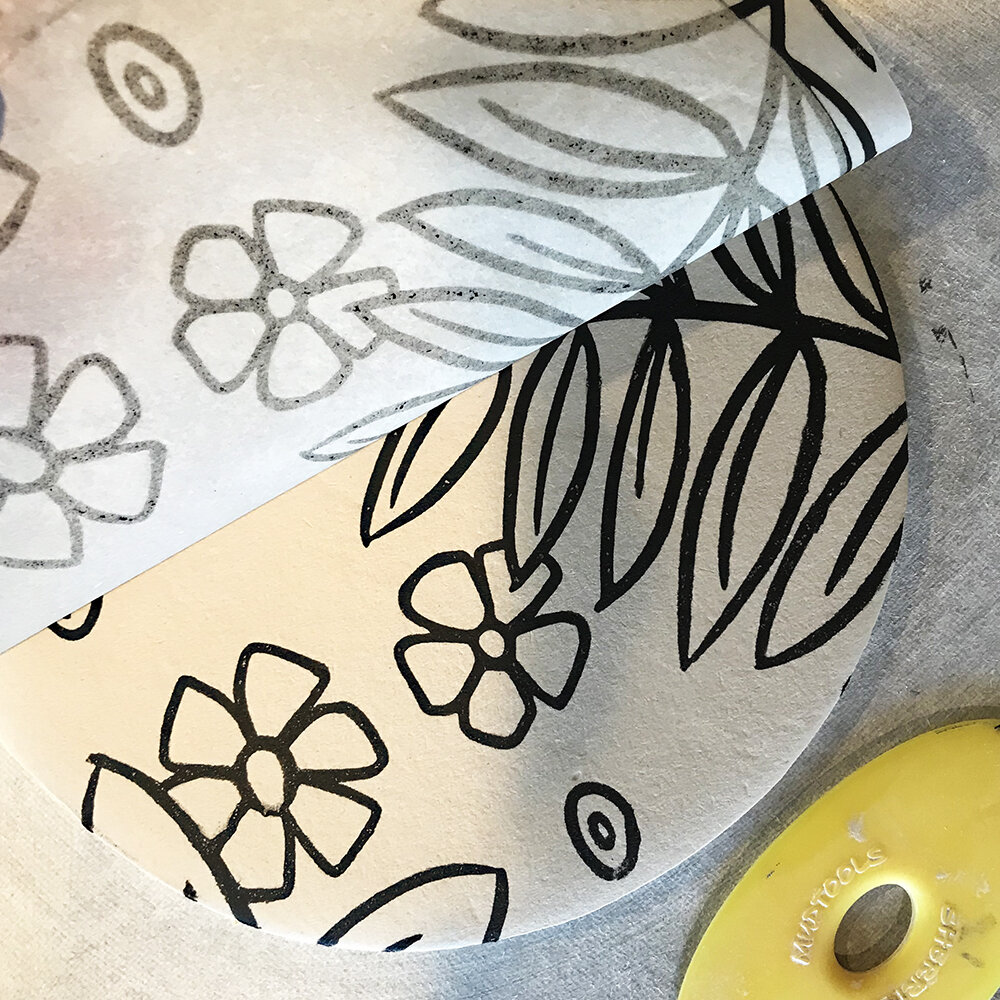
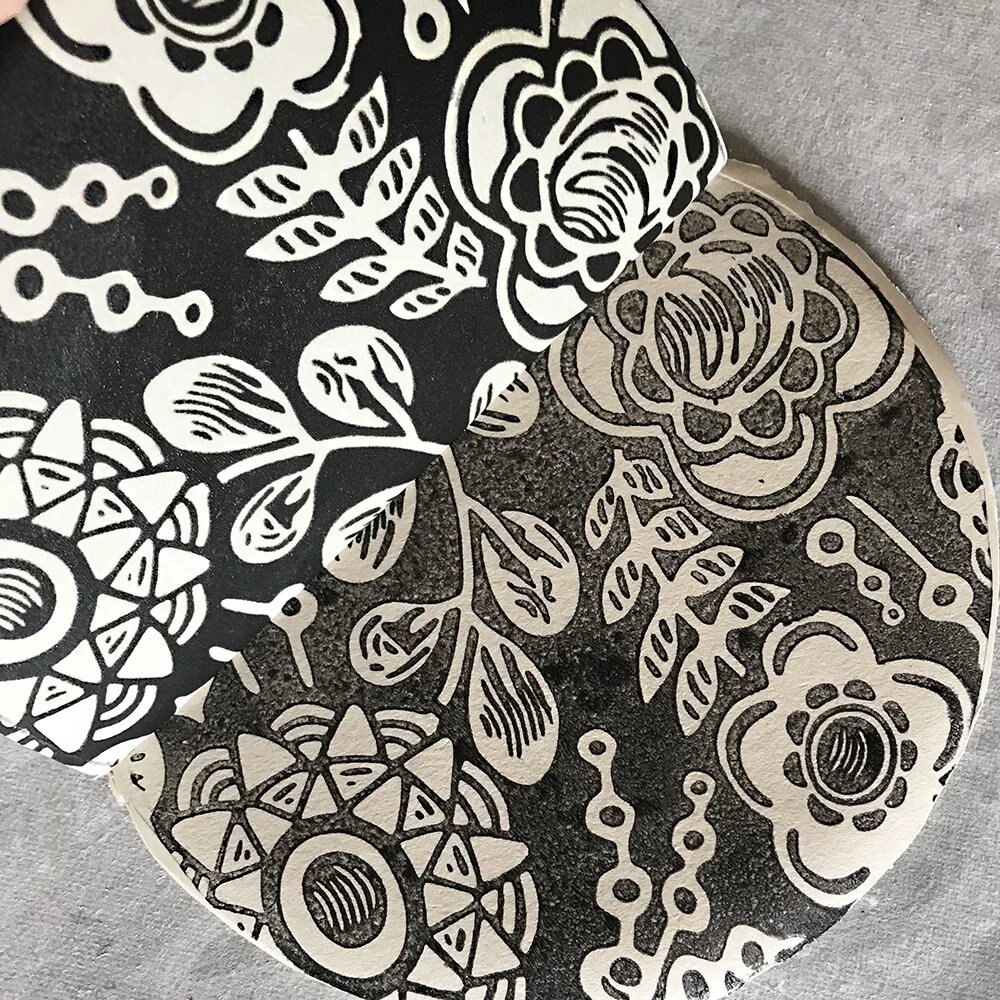
Freshly silk-screened newsprint transfers.
Part of the beauty of newsprint transfers is a peeling wallpaper, creased and folded, aged poster-like look. I especially like seeing the color of the clay body coming through. But maybe you want a more opaque look, which is possible by a thicker application of slip. Either way, I would suggest doing some small test tiles with the samples I include with every order. Familiarize yourself with the different approaches below and see which one appeals to you and suits your style and method of working. It’s totally up to you which way you go for the effect you’re after. You can follow my guide to get going, but keep experimenting along the way. Who knows, veering off the beaten path may lead you down a road to a whole new technique that no one has ever thought of.
There are some wonderful clay artists out there who are doing some amazing things with transfers on clay, a few of my favorites being Jason Bige Burnett, Catie Miller and Forrest Lesch-Middelton. They are leaders in the field and have made how-to videos, written articles in publications such as Pottery Making Illustrated, and have shared extensively about their processes on social media and YouTube. There’s a ton of information and instruction out there beyond that - you just have to go looking for it.

Using a green slip for the background of a transfer.
One note to keep in mind over all others is that the wetter the transfer, the greater the chance the transfer will smear. Underglaze transfers demand a lot of patience and smearing is the result of rushing the process. However, if it does smear, there are ways of fixing it - either by cleaning it up with a sgraffito tool (and adding some carving detail while you’re at it), or taking some underglaze or slip and with a brush, patching things up here and there. Or if you have to, wipe it all away and start over. It’s all good! Every mistake has a purpose and each time you try a technique, you’ll get better and better at it.
I hope you enjoy using these underglaze transfers as much as I enjoy making them. For me, they have taken me back to my technical illustration and graphic design days. I love getting on the computer and rehashing those skills and applying them to the process of silk-screening. I look forward to adding more patterns to the transfer shop as time goes by. Printmaking is an art unto itself and a labor of love, as are all pieces of handmade pottery in my opinion. I encourage you to give newsprint transfers a try and please don’t hesitate to reach out if you have any questions!
Cheers, Melynn
Working with a Semi-Soft Slab
Slip on Newsprint
This technique works well if you are transferring an image to a flat slab which will then be formed around a mold.
Cut your transfer larger than you need so you have something to hold onto when transferring.
Check and adjust the viscosity of your slip. It should be similar to a yogurt-like consistency.
Depending on how opaque you want the background color, brush 1 to 2 coats of slip on the transfer and wait for the surface to dry to a satin sheen in between coats. The transfer is ready to apply to the clay when you can lightly touch the slip and it doesn’t come off on your finger and the surface goes from shiny to looking dull.

Brushing a coat of slip on a newsprint transfer.
Once the slipped transfer is ready, pick it up and carefully apply it to the surface of the clay. Gently pat the transfer into place and let it sit for a minute or two. Once the newsprint is down, it needs to stay down. Do not try to reposition it or else it will smear.
Wait a couple of minutes more, then roll with a brayer or burnish with a soft rubber rib. Press lightly to start to avoid smearing the transfer. Start in the center and work outwards, moving air bubbles towards the edge as you go.
Take your time and allow the image and clay to “marry” and adjust to each other’s moisture. Sometimes this can take place in a matter of minutes. Other times it can be longer depending on factors such as time of year, temperature and humidity of the studio, dry or wet climate, how thick your clay is, or how much moisture is in the clay to begin with.
You will be able to see the image on the backside of the newsprint while you are working. Stop burnishing if you start to see the transfer smearing and wait a little longer for the slip to lose some of its moisture before continuing.
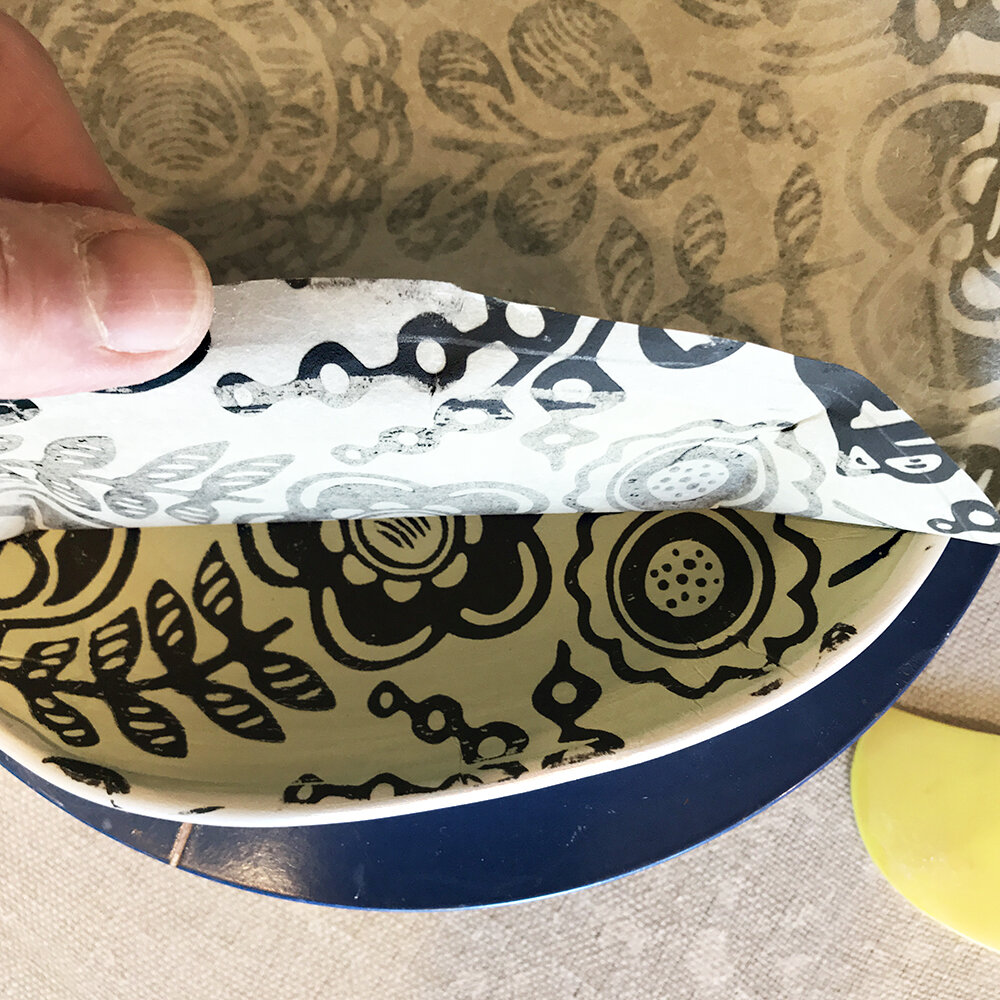
After the first round of burnishing, lift one edge of the transfer to see how the image is transferring. If there are any areas that haven’t yet transferred, put the newsprint back down and burnish again, lifting periodically to check until you are satisfied.

Peeling back the newsprint to check on how the image is transferring.
You can lightly sponge the backside of the newsprint if it starts looking dry. Use a stiffer rib if needed but be careful not to burnish too hard or the newsprint may tear. Once the transfer looks good, gently peel away the newsprint until the entire image is revealed.
When the newsprint has been completely removed, it’s important to tap down any stray air bubbles on the surface or little bits of the image that haven’t quite adhered. Air bubbles can reveal themselves again in the glaze fire. Another way to get rid of air bubbles is to lay a blank piece of newsprint or paper on the slab once the transfer has dried enough so that it doesn’t smear. Then roll it with a brayer.
Finally, touch up where needed with underglaze or slip using a small brush.

Touching up the image with violet-colored slip and black underglaze.
When the slip and underglaze transfer have set up so that it doesn’t smear when handled, go ahead and form your piece. At this point, other elements of design can be added such as textured rollers, sgraffito, dots, lines or stamps. Get creative and have fun!
Pressing a GR Pottery Form into the clay that is supported by a piece of upholstery foam works great for making plates and platters.
Adding More than 1 Color to the Transfer
You can add more than 1 color to a transfer by brushing colored slips into different areas of the design before you apply it to the clay. You might need more than 1 coat depending on how opaque you want the colors to appear. Once all of the areas are filled in, wait for that magic moment of a satin sheen look, then brush on 1 or 2 coats of your background slip. Let that dry to a satin sheen and then do the transfer following the steps listed before.

Brushing green slip onto the leaves of the transfer.

Adding more colored slips to the transfer.

Brushed slip on the entire newsprint transfer and waiting for it to dry to a satin sheen. A hair dryer or heat gun can speed this step up if short on time.

Transferred image on clay and formed around a GR Pottery Form.

A finished tray with multiple areas of color and a white slip background.
Direct to Clay Using No Slip
Mist both sides of the transfer with water with a very fine mist. Avoid large droplets of water on the transfer. First mist the back until you see the image coming through the newsprint, then mist the front.
Wait until the transfer dries to a satin sheen, then press it gently onto your slab. If you transfer the image too soon, the image will smear.

Gently pressing the backside of the transfer onto the clay.
After the transfer is applied, wait a few minutes for the surfaces to “marry”. Then roll with a brayer or lightly burnish with a flexible rib.
Check to see how the transfer is working. You may need to use a slightly damp sponge on the backside of the newsprint in areas that look like they are drying out.
Checking to see how the image is transferring to the clay.
Follow the steps listed above for burnishing. Keep in mind that the longer the transfer sits, the more aggressively you can burnish without smearing.
NOTE: This technique can produce either a lighter image if your clay is on the leather-hard side (almost like a photocopier type of look), or a stronger image if the clay is semi-moist. Experiment to see which effect you like best.
An example of a direct transfer that has a photocopier look.
Working with a Semi to Leather-hard Slab or Formed Piece of Clay
Slip on Clay, Mist on Transfer
If your clay is in the semi to leather-hard stage or your piece is already formed, brush 1-2 coats of slip on the surface of the clay. Let the slip dry to a satin sheen in between coats.
Meanwhile, mist both sides of the transfer with a very fine mist of water. Avoid large droplets of water on the transfer. First mist the back until you see the image coming through the newsprint, then mist the front.
Wait until both the clay and transfer are in the satin sheen stage, then apply the transfer to the clay. Wait a few minutes for the surfaces to “marry”, then roll with a brayer or lightly burnish with a flexible rib. If you apply the transfer too soon, it is going to smear.
Follow the steps listed above for burnishing, etc. Keep in mind that the longer the transfer sits, the more aggressively you can burnish without smearing.

Waiting for the green painted slip and misted transfer to go from shiny to looking dull before applying.
NOTE: Be aware that you are going to get some folding and wrinkling in places as you apply the transfer to your clay, especially around curves if your piece is already formed. That folding and wrinkling is part of the process and creates a look that can be one of the highlights of the image transfer technique.

Applied transfer to the plate form. Some folding and wrinkling will occur on areas that are curved.
Checking to see how the image is transferring.

A beautifully transferred image on a porcelain plate with a green background.
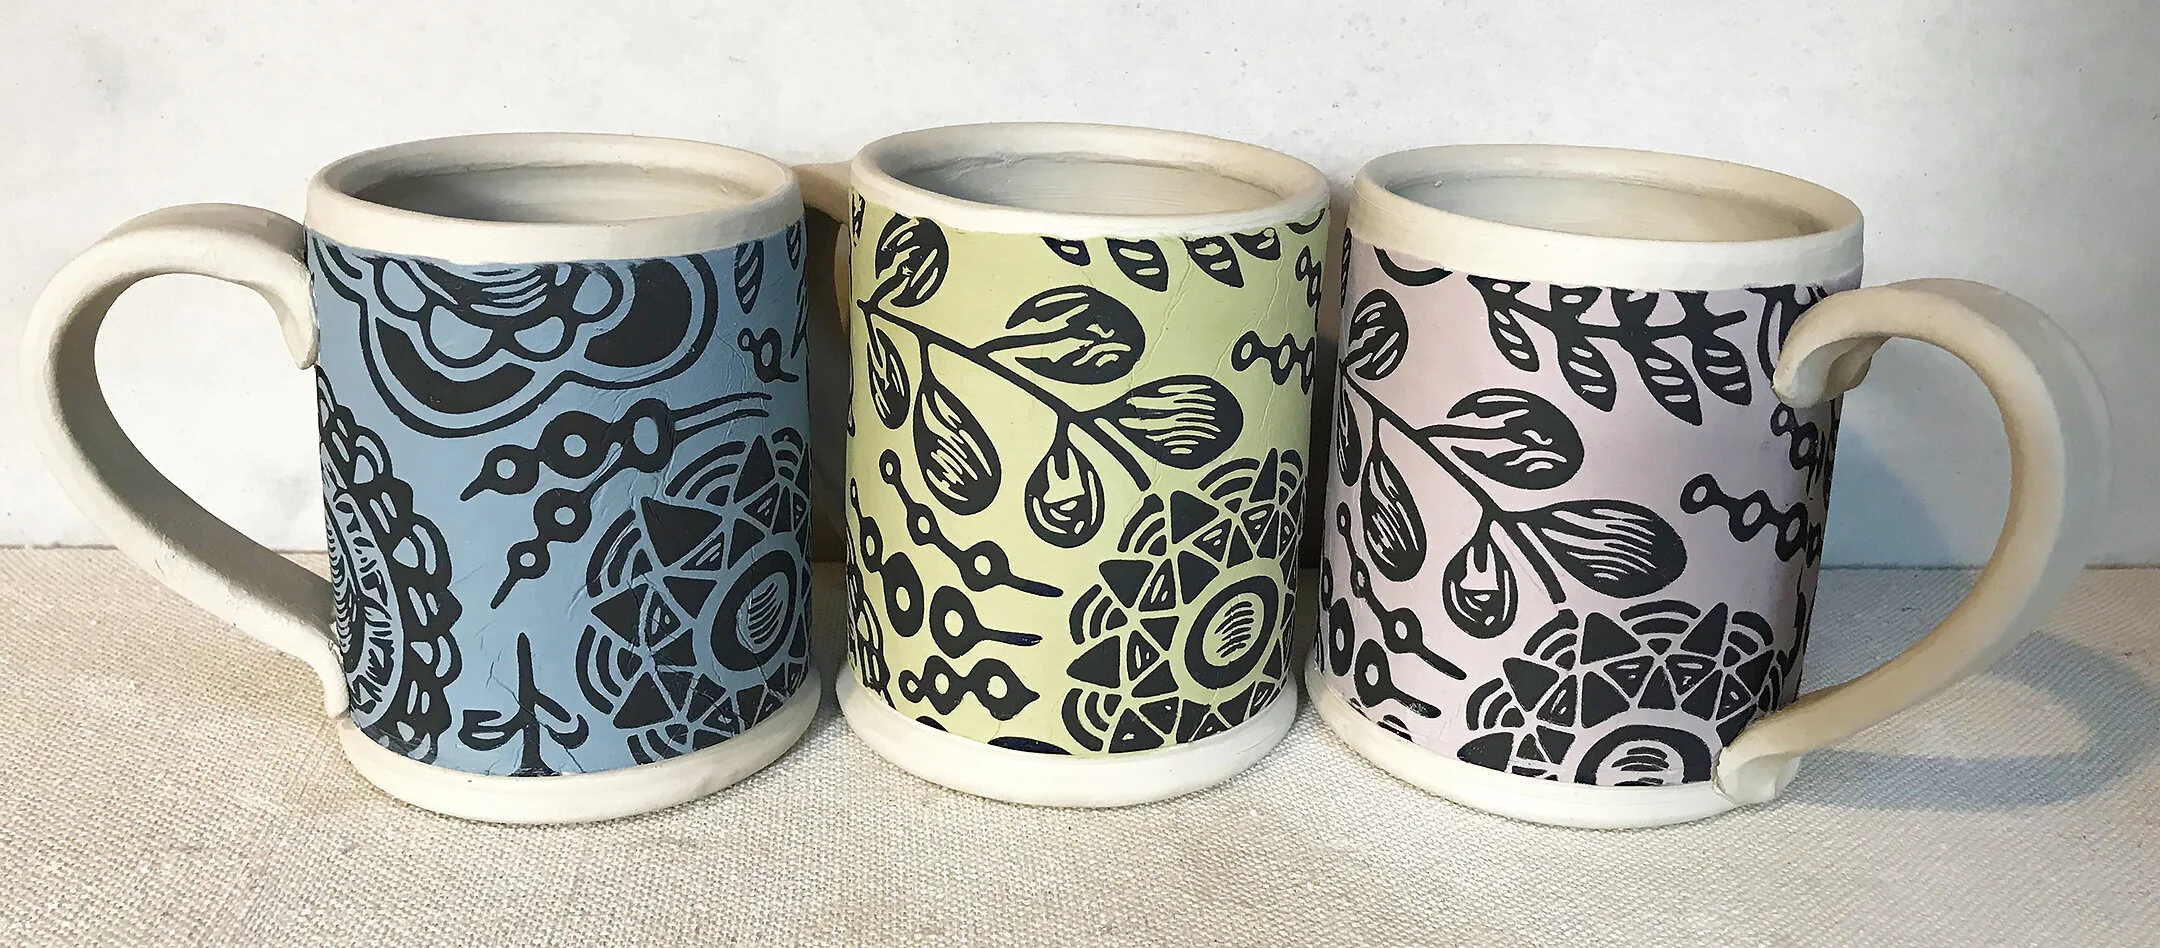
Transferring an Image to a Cylinder
This technique is the same as transferring an image to a flat slab or a formed piece, but a little trickier if you’ve never done it before. Any of the methods described before work depending on your skill level as you’ll be handling the cylinder as you press the transfer on. Some methods might produce a lighter print than others. Again, you choose the technique and look that you want to achieve.
Pre-cut your paper to fit the cylinder with just a little overhang top and bottom, and an overlap as well.
As far as handling, one way is to hold the cylinder with one hand inside to support it. The clay should be fairly leather-hard at this stage or you risk warping the shape. Press the transfer on with the other hand while rotating the piece.

Holding the cylinder while pressing on the transfer.
Once the transfer is completely pressed into place, go back to where you started and begin burnishing. There will be some folding and creasing of the paper involved especially if your cylinder isn’t straight sided. These folds look really nice once glazed and is part of what makes this process interesting.
Pay particular attention to the rim as it is usually drier than the rest of the piece and will need more burnishing. It helps to cut parts of the newsprint off once its transferred so it doesn’t get in the way while continuing to burnish.

Pulling off the transfer while rotating the banding wheel. The rim and foot will be cleaned up with a trimming tool when back on the potter’s wheel.
Make sure to tap down any stray air bubbles on the surface or little bits of the image that haven’t quite adhered.
Once the transfer is done and set up so that you can touch it without smearing, you can put the piece back on the potter’s wheel and clean up the rim and foot with a trimming tool if you want a more refined edge top and bottom.
One Last Note:
All of these techniques can be tried out on other transfers besides Plum Island’s. You can even make them yourself! All you need is some newsprint, some underglaze to make your drawing, and some slip to make the transfer. Other colors of underglaze besides black could be used too. Have fun and good luck!
Other Tips and Examples

Gently pierce the transfer with an exacto knife to get rid of air bubbles. Be careful not to puncture the clay.

Be sure to check for small air bubbles and tap them down as they can pop up through the slip during the glaze firing. Check for them again after the bisque fire and sand if needed.
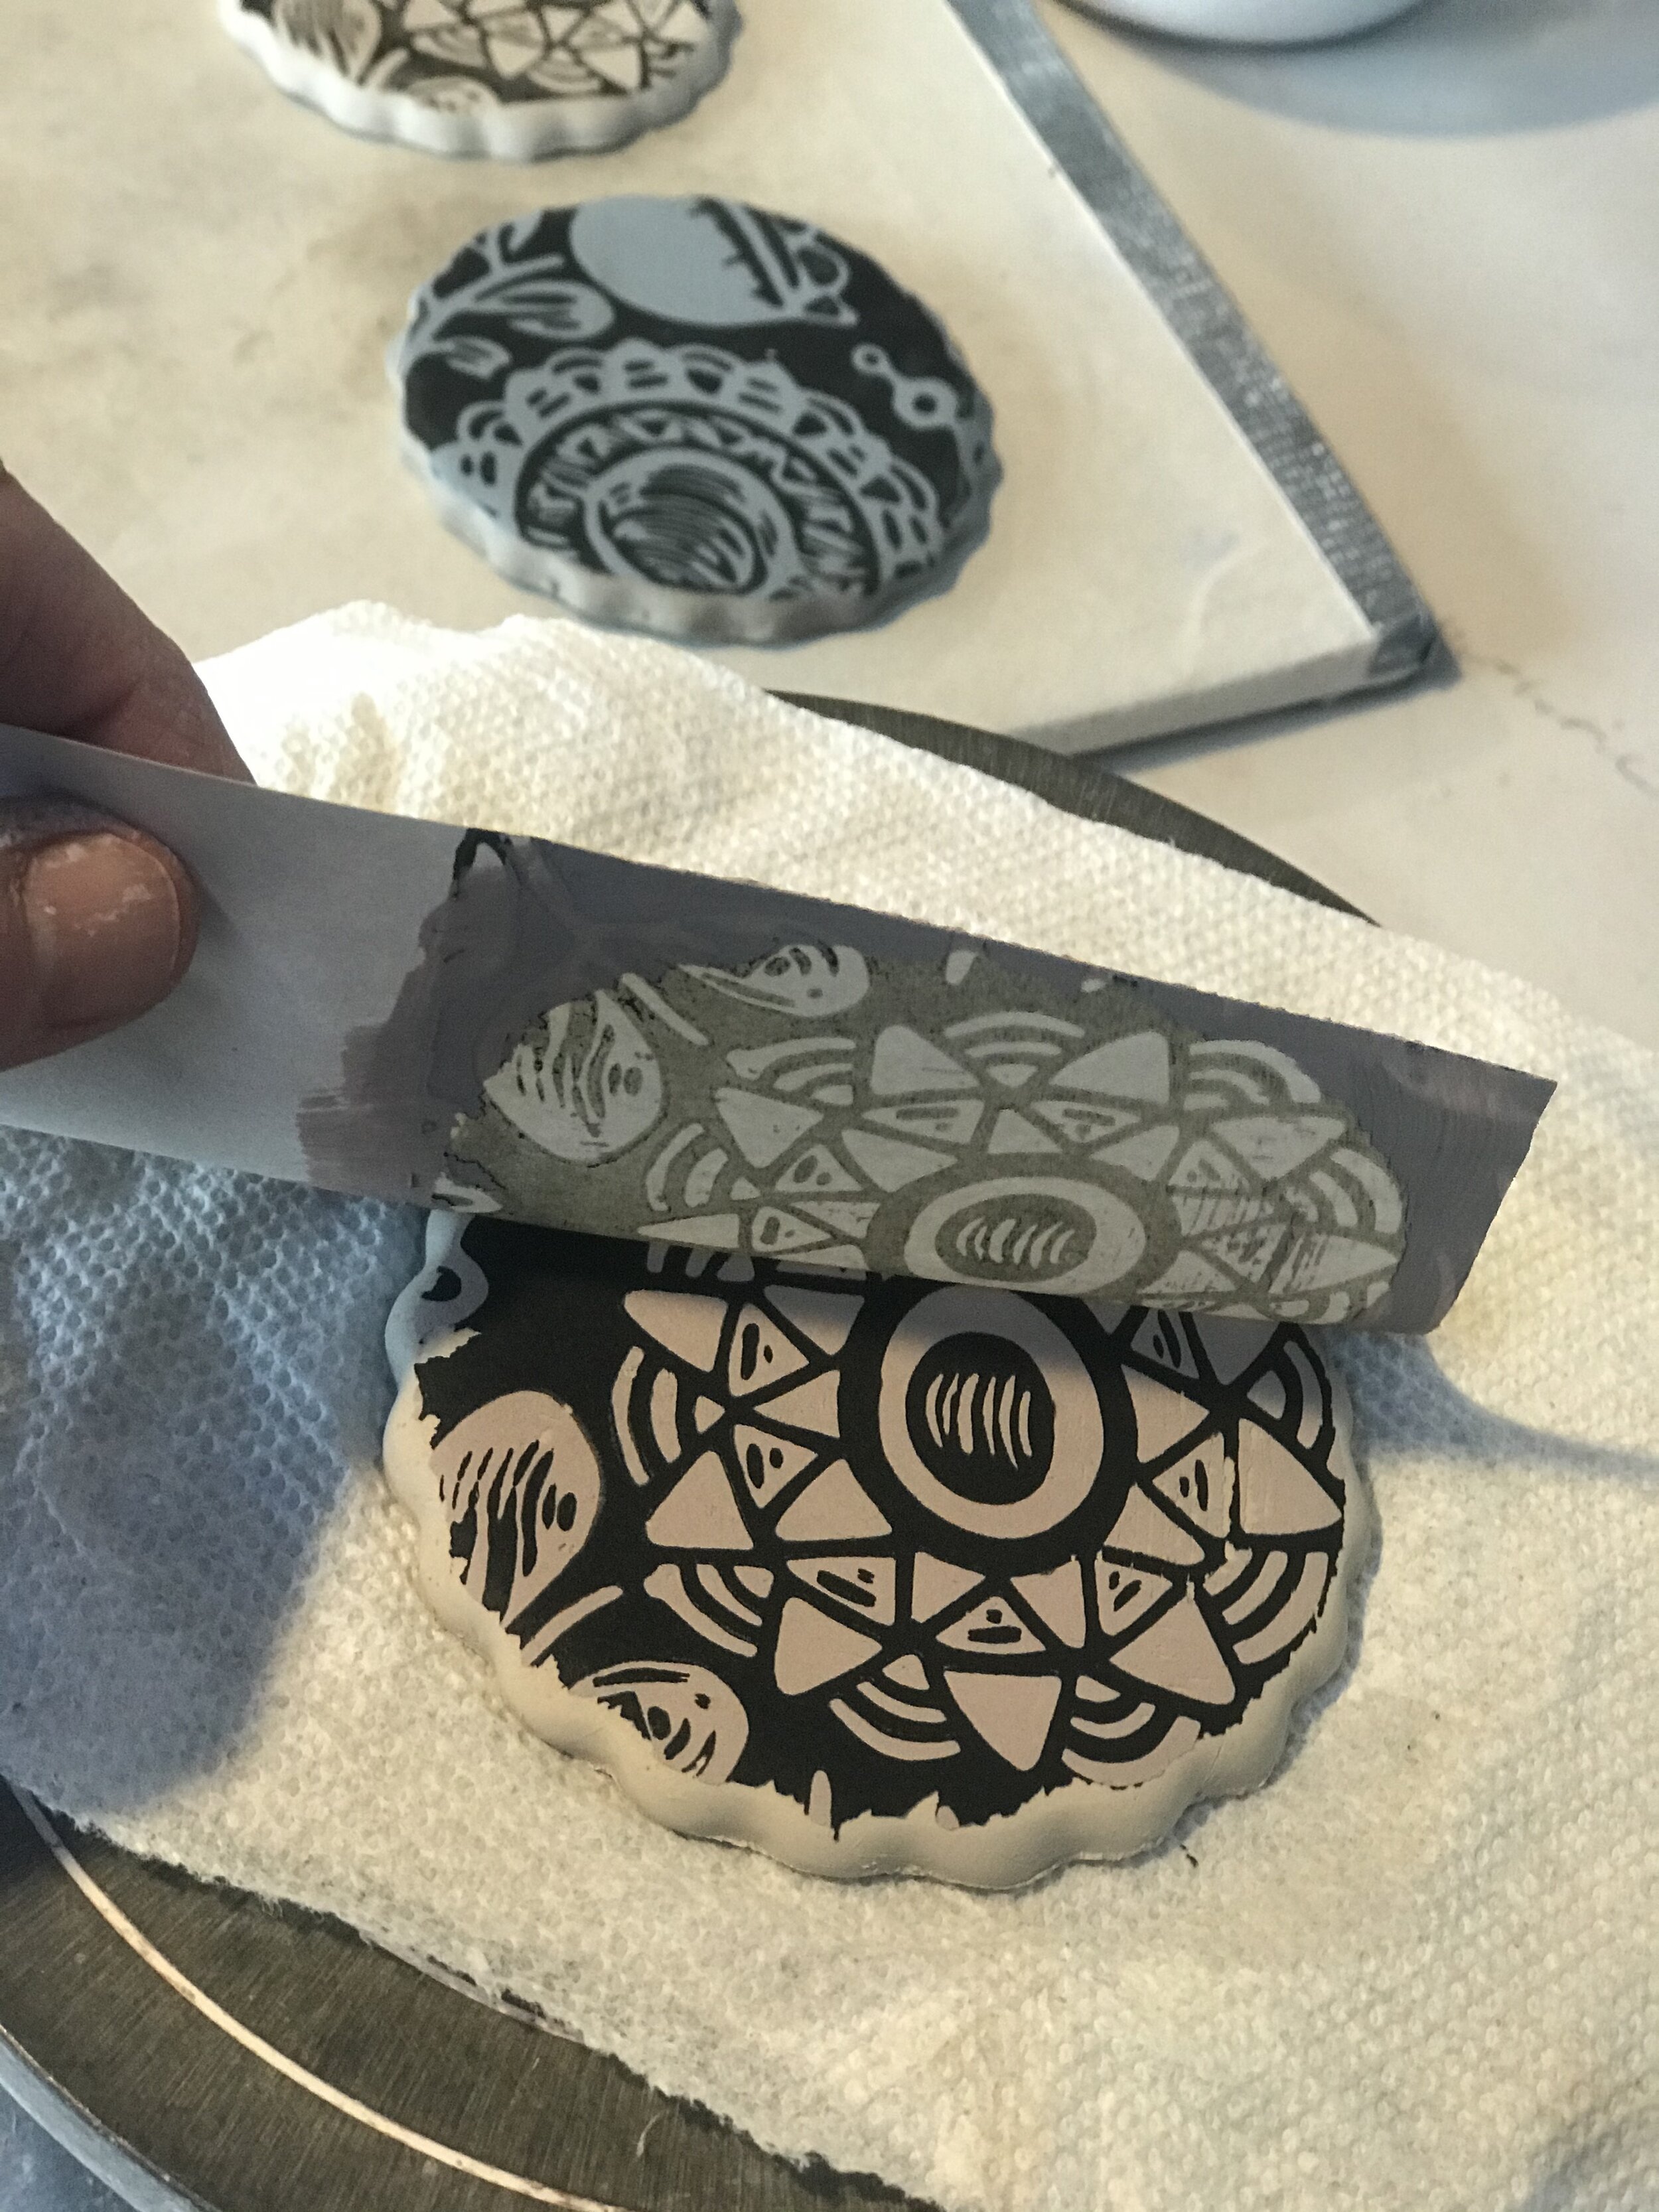
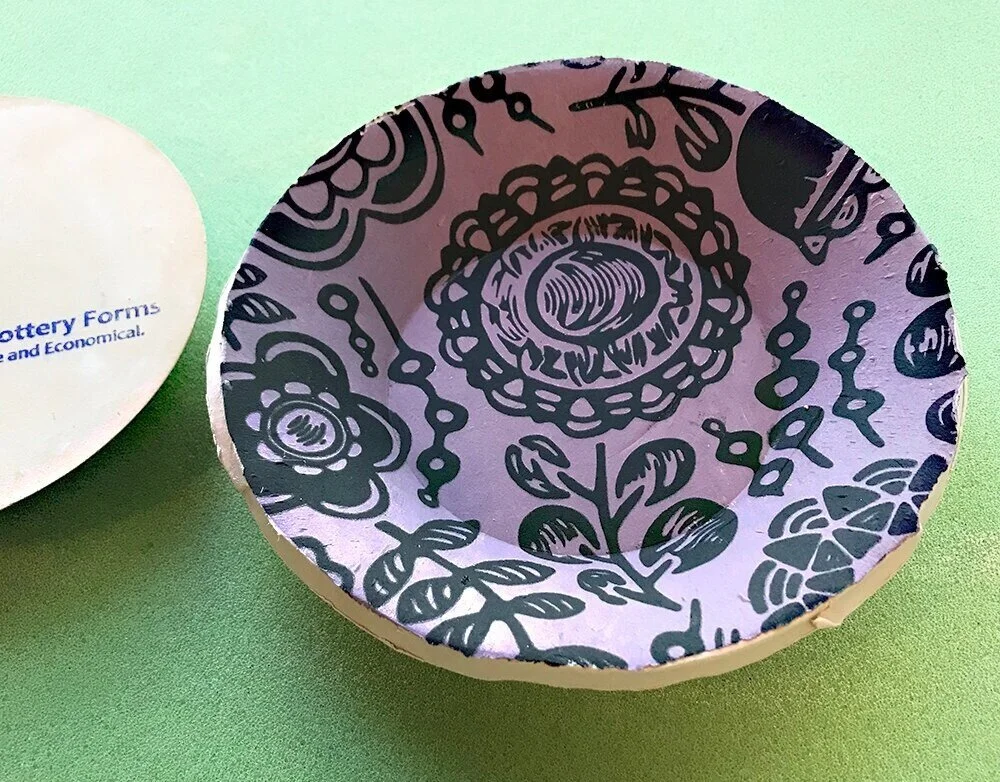
Peeling off a transfer from a test tile. When most of the ceramic ink is on the clay and very little if any left on the newsprint, consider it a successful transfer.
An example of a nearly perfect transfer with very little underglaze left on the newsprint.

Keep small leftover pieces of your newsprint transfers to use in another project and/or as part of a larger design.
Resources

My collection of books on image transfer.
Ceramic Transfer Printing, by Kevin Petrie
Ceramics and Print, by Paul Scott
Image & Design Transfer Techniques, Edited by Paul Andrew Wandless
Image Transfer on Clay, by Paul Andrew Wandless
Graphic Clay, by Jason Bige Burnett